Thank YOU! It's Customer Appreciation Week!
EXTRA 11% OFF Orders $100+ With Code: THANKYOU
EXTRA 11% OFF Orders $100+ With Code: THANKYOU


Be the first to cheer this project!

 Give a Cheer
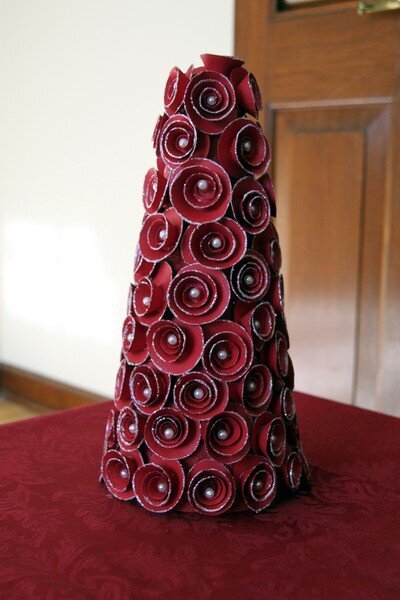
Merry Christmas everyone! I feel so lucky to have the opportunity to share my Christmas Rosette Tree tutorial for the 20 Days of Holiday Sharing event here at 2Peas! In the first two photos you can see the finished product that you can easily create by following a few simple steps (and most of it can be done while watching a movie!) First, get a styrofoam cone from your local craft store. They come in all different sizes, so you can choose what is right for you. Also, have in mind what color paper you will be using on the tree, as you should match your acrylic paint to that. For step one, paint your cone with acrylic paint using a a foam brush. It's best to stipple the paint on instead of dragging the brush across the styrofoam.In step two, punch circles from your chosen paper. I used a 2“ punch on this tree. For my 9” tree, I made approximately 80 rosettes, but this will vary according to how tightly they're rolled.Next, using precision scissors, cut a spiral in your circle. It's best if it gets wider toward the center. Make sure to leave a circle in the center, as this is what your rosette petals will glue down to.For step four, I started curling my rosette around a nail driver (a tool you can easily find at any hardware store) but this can also be done with your fingers. Try to get it as tight as possible.Once you have curled the whole spiral, it should look like photo number 5. Don't worry if it looks too tight, it will loosen as it sits.To keep the rosette's shape, put a ring of hot glue around the bottom and hold the petals down for a few seconds. Once your glue has hardened, brush gel adhesive along the edges of the rosette for step 7. I love Martha Stewart's all-purpose gel adhesive for this step because of the sponge applicator.While the glue is still wet, dip the rosette upside down in fine glitter. If you're picky, and you want your glitter to go all the way to the center of the rosette, you'll have to use your fingers.Your finished rosette should resemble something close to photo number 9. From here, put a small amount of hot glue on the back of each rosette and affix to your painted styrofoam cone, trying to get the rosettes to touch and overlap so that as little of the background is showing as possible. Once my entire tree was covered, I finished it off by pressing a pearl tipped corsage pin into the center of each rosette. I hope you enjoy making this, and seeing it out in your Christmas decorations as much as I do! Meghann Andrewhttp://www.meghannslittlecorner.blogspot.com [meghannslittlecorner.blogspot.com]
No products have been added to this project.


Thanks for spreading positivity!