Thank YOU! It's Customer Appreciation Week!
EXTRA 11% OFF Orders $100+ With Code: THANKYOU
EXTRA 11% OFF Orders $100+ With Code: THANKYOU


Be the first to cheer this project!

 Give a Cheer
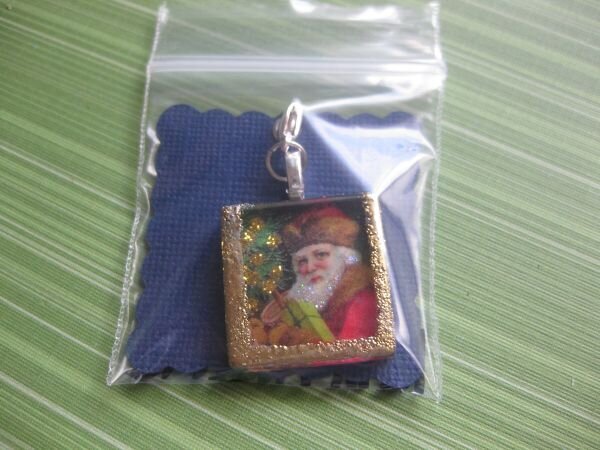
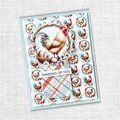
Photos 1, 2, 3 & 4) Completed charms. Photos 5 & 6) Some of the materials used.Printed out a sheet of 1x1 vintage christmas images from Lunagirl.com (images shown in photo 5 are not the ones I used for this project). I printed on the blank side of Daisy D's patterned paper so that the back of the completed charm would look finished. Used stickles to accent the images and let dry. Used glaze from SunAndMoonCraftKits (Glossy Accents or Diamond Glaze may work, too, but I didn't test either of those) to adhere 1x1 glass tiles to the images (making sure to try & get all the bubbles out) and let that dry. Then cut all the images/glass tiles from the sheet and used a Basic Grey sanding tool to smooth out the edges. Adhered the bails with E-6000 and let that dry. Used Ranger gold embossing powder to heat emboss the edges on the front of the tile (really gave them a 3-D effect). BE CAREFUL…the glass tiles get super-hot when you're heat embossing them; I used pliers to hold them by the bail when I did this part. (Glass tiles, glaze, E-6000 and bails were all purchased from SunAndMoonCraftKits on Etsy). These were fun to make - you should try it!
No products have been added to this project.

Thanks for spreading positivity!