Storage & Organization up to 60% OFF!
Plus, a FREE Gift! | Details Here.
Plus, a FREE Gift! | Details Here.

 Give a Cheer
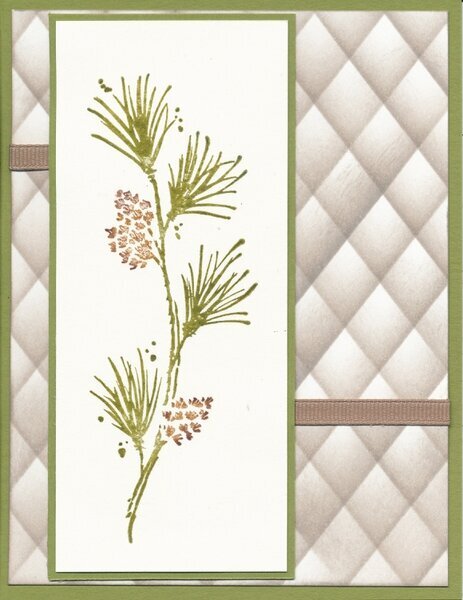
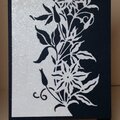
CARD:
4 1/4 x 5 1/2
Stampin' Up! Old Olive Cardstock
Card Design is from Gina K's video:
http://stamptv.ning.com/video/pillow-top-background [stamptv.ning.com]
FOCAL IMAGE:
Stampendous Ponderosa Pine, Y013
Kaleidacolor Inks or Distress Inks, applied directly to rubber
140-lb. hot press watercolor paper
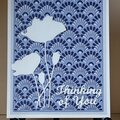
BACKGROUND:
Pillow-Top Technique (from Gina K's video)(Lines are 1/2" apart this time.)
Neenah Solar White Cardstock
Distress Ink, Pumice
EMBELLISHMENT:
Grosgrain Ribbon
Two days ago, I posted this card: http://www.scrapbook.com/galleries/13464/view/4938317/-1/72/0.html
Since then, I tried to think of ways to make the background even without using a ruler. I thought of laminating a piece of grid paper; that made me think of the glass cutting board that I have that already has a grid imprinted. I tried that this morning. It worked just fine, but as I was moving the plastic piece around, I thought I could just draw a line on the plastic piece itself. I used an Identi-Pen to draw a line 1/2 inch from the edge. That worked great until it was time to flip the paper around and continue. I ended up with an empty space in the middle of the card. So, you can't flip the paper. You have to make all your ink lines in the same direction. You can't flip the plastic either; it doesn't turn out correctly if you do.
I ended up using the line on the plastic to do the top half of the lines. Then I used a Judikins ruler (with lines going the length of the ruler as well as the width) to do the bottom lines, lining up the ruler to the line I had already made and butting the plastic up to that. Worked great.
Now, mind you, Gina K just eye-balled it. I didn't have much luck doing that as you can see in the first post. Now that I have figured out what is the easiest way to space the lines for me, it's really easy.
OK. For those of you whose computers don't like video, I thought I'd explain the process in words. If you like video, the link is in the card description at the beginning of this post.
1. Use a piece of acrylic or thin plastic from an old package for making your lines. Cut it on a paper cutter to make sure the edges are straight and smooth.
2. Important: Use removeable tape or adhesive to temporarily attach your cardstock to a craft sheet or your work surface. If you don't, the cardstock can move and easily mess up your lines. See the second scan on the first post.
3. Place the plastic diagonally on the cardstock, lining it up so that it is touching each of two opposite corners (middle of the cardstock).
4. Use an ink applicator, dauber, or sponge to apply the ink along the edge of the plastic. TIPS: Don't ink up the applicator too much. You can see on this card what happens if you do. Also, put the ink applicator on the plastic to begin, and then spread out to beyond the plastic to create the line. When I started on the paper, I got uneven coverage.
5. Ink up the lines, beginning in the middle of the cardstock and ending in a corner. Without turning the paper, go back to the center and ink up the lines from the middle to the other corner. The plastic allows you to see the lines you've already made so that you can place your next line accurately.
6. Now turn the paper so that you can repeat the process, beginning in the middle of the paper and creating lines to create diamonds.
TFL.
Daria
ETA: (07.06.16) I learned a lot while making backgrounds for a new challenge and thought I'd share some more tips here in case anyone comes to this thread to learn how to do this technique:
1. I found I liked the effect best with lines that were not too far apart. I settled on a half inch space between them.
2. I also am now using a glass mat that has grid lines on it. That way, I can temporarily attach the cardstock to the mat so that the opposite corners line up with the same grid line and just move the piece of plastic. I mentioned this to Cindi, and she suggested putting the grid paper in a page protector if you didn't have a glass mat. Great idea!
3. The ink applicator that worked the best for me was Tsukineko's Ink Sweeper, the long, thin ink dauber. However, start out using what you are accustomed to. It will probably work best for you.
4. The hardest part for me was to use a light hand. No pressure. I tapped the ink onto the plastic along the edge and then very lightly transferred it to the cardstock. I had to keep reminding myself to go slowly and not to press down. It worked better to just go over it a couple of times instead of pressing down to apply ink.
5. I had great luck using Memories Inks Made for Hero Arts Shadow Stamps. Yep, that's what they were called. The colors are soft. The nice thing about this technique is you can make it what you want, whatever suits the mood of your card--pastel or bright, soft or vivid, serene or wild.
6. One more thing. My rejects, even the worse one, looked great when die-cut with an intricate die. I used a sentiment die.
Have fun.
Daria
No products have been added to this project.


Thanks for spreading positivity!


June 17, 2016