Having the right stamping ink is just as important as having the correct paper. If you do not have the right paper or the right ink, you will most likely become frustrated when trying to color with your Copic markers. Once you have the right papers and inks, then coloring with Copics is not only fun but it can be very relaxing. So, today let’s look at how to choose the stamping inks to use with your Copic projects.
Choosing the Right Stamp Inks
There are many, many stamping inks on the market today but not all of them are inks that you want to use with Copics. Let’s look at how to test the inks you do have, to see if they will work with Copics.
Before beginning, make sure you have scrap paper covering your work surface because the Copic marker will most likely bleed through your paper. That is perfectly fine and is normal but you want to protect your work surface.
To begin:
- Cut several 2” x 2” swatches of your favorite Copic paper, or the paper you chose from your paper tests suggested in my last article.
- Choose a stamp that is fairly open for coloring and has a defined edge. I chose a heart stamp. A circle or border stamp would be great too.
- Grab all of your favorite stamping ink brands and stamp the image using each brand of stamp ink on a separate paper swatch. Be sure to label each swatch with the name of the stamp ink. You can see my swatches here:

- Let dry for at least 15 minutes, or heat set. You want to make sure your inks are dry or the ink will smear because it is wet, and not necessarily because it is a “bad” ink.
- After drying, take a light-colored Copic marker and color over a portion of the stamped image on one swatch. It may smear. This is what we do not want and why we are testing our stamping inks. If ink gets on your Copic marker, it will not hurt it. You can try to clean your marker off on a scrap piece of paper like I have done here. If it does not come off, it will not affect your Copic marker; it will just have “cosmetic blemish.”

- Notice the dot at the top of the heart. You will want to test each swatch like that also. To create that “dot” of color, press your Copic marker down onto the paper next to the edge of the stamped image. The marker nib will bend a bit as you press down. That will not hurt the nib or the marker. You want to press down the nib to allow color to come out and oversaturate the paper. The spot will grow as more ink comes out. Watch to see if the stamp ink bleeds out of the lines. That would not be a stamp ink you want to use. The above image is actually a sample of a great ink!
- Repeat these steps with each swatch of stamp ink you are testing. Here are my finished test inks:

- Here is an example of a “bad” ink for Copics. Here you can see how the stamp ink smeared when I colored over it, and it also feathered out when I created my blob of Copic ink at the top of the heart. You would not want to use this stamp ink or any stamp ink that causes feathering or smearing of the stamp ink.

- Here is an example of a “good ink” for Copics. Notice there is not any feathering or smearing. This would be a great stamp ink to use with Copics!

My personal favorite stamping inks to use with Copics are Memento and Tim Holtz Distress Inks. The Tim Holtz Distress Inks were created for use with alcohol inks which makes them perfect to use.
Keeping Your Samples
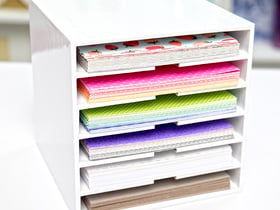
You will want to keep these samples you create. As you continue to create, you may need a certain ink for a certain medium. Maybe the Memento and Tim Holtz inks will not work with the medium you are using. You will need to test your other inks to see if they will work with both your Copics and the medium you are creating with. Once you create a test swatch, you will always know how your stamp inks will react with Copics. Here you can see my swatch book.

I hope you have fun testing your stamp inks with your Copics. Enjoy testing and happy coloring!
Patter Cross is a Copic Certified Designer


