


I have never tried distressing so I didn't want to buy anything too expensive. This is just the right price. It isn't expensive at all and it does the job although you will probably have to run it over the page severall times to get the right look. However, I can't complain too much for the $1 it cost. It is definitely a good starter tool for people wanting to experiment with distressing, like me. I actually inked the page before I distressed it and really liked the final product.
Used in this project: Jenn & Phil's 2007 Holiday Party

For the price I think this is an excellent little tool. I use it in conjunction with sandpaper or the Basic Grey precision file set. It takes patience and time, but it works! Works better on cardstock than thinner paper. You can get it to work on lighter weight paper you just have to do smaller sections at a time.
Used in this project: Jasper Just an average day

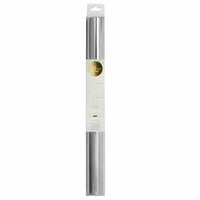
The edge distresser is a disk with a razor blade inside it. Scraping it along the edge of your paper gives you a variety of looks, depending on the pressure you apply, the angle you scrape it at, and even whether you're altering dry or wet paper. There are lots of ways to distress paper, and this little tool just adds another dimension to your products. And for the price, it just can't be beat!

The circular shape makes it easy to hold and you can't go wrong with pink! The distressing is subtle and not too much. It is a cheap way to add a little age to your page! Looks great on heritage pages!
Used in this project: Family is Everything

This little tool is so light and easy to use. You simply rub it back and forth along the edge of your paper and you are left with a nice, distressed edge to ink or leave as-is. It is much safer to use than the edge of your scissors, and won't take up much room in your crop bag.
Used in this project: It's a Girl! (2 page LO)

I edge distressed every single one of my 3-peice -wedding invitations and they turned out beautiful!!! Yes, it is just razor blade protected with a peice of plastic to run along side the edge of your cardstock,,, but for 99 CENTS, thank you for doing the work Heidi! :)
Used in this project: Blue Christmas Gift TAG/CARD

I recently bought this and I'm in love! It's super cheap but amazing. Gives your LO's and projects that rough, distressed look!
Used in this project: new do

I recently bought this and love it! It's so cheap and easy to use-just drag it along the edge of the paper and you're done! Gives it a distressed look very quickly.
Used in this project: Just Monkeying Around

I do like just how "rough" this makes the edges of cardstock, but I wish it was easier to grip while "roughing" the edges.. I find I end up creasing my paper because it's all so much to handle at once! But it is neat!
Used in this project: Love
You must be signed in to comment. Please click here to sign in.