

 Give a Cheer
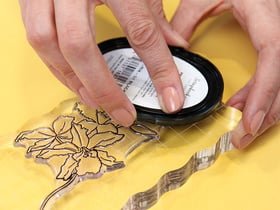
Using the darker paint I painted the entire piece of shiplap.
I gathered a handful of the wood pieces and using my band saw, I cut them into smaller pieces.
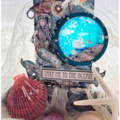
Before gluing anything down, I laid out how I wanted my design to look like. I even laid the stars, berries and beads to get an idea of where to place everything. I added in a few more smaller pieces of wood where needed.
Next, I glued the wood to the shiplap and then using sizzix crystal paste and a spatula, I wiped the paste onto the wood pieces to create a snowy effect. The paste has glitter in it and I love how it sparkles when it dries.
While the paste dried, I painted the stars with silver paint. After everything was dry, I glued the stars, beads and berries to the tree.
Finally, I grabbed my splatter paint brush and splattered white, pink and black paint onto my project to create texture and stars.
I love how it turned out. I hope I have inspired you to make your own winter tree.
Thank you for looking and I hope you have a happy and cozy holiday!
- Jennifer
No products have been added to this project.


Thanks for spreading positivity!


December 10, 2023