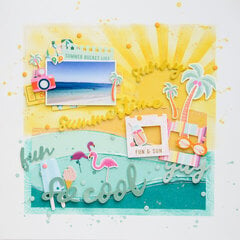
I've got 2 ways to approach fussy cutting:
1. Draw a border along the stamped image so that the cut always 0.1 inch away from the image.
This gives the image a nice white border. I usually make sure to soften any angles because I think it looks nicer.
2. Cut as close as I can to the stamped image.
If you use method 1 the image will be more noticable. It's good if you have a busy background.
If you use method 2, the image will blend in better.
Both ways are good. Which one you choose depends on what you want your project to look like.
This card is 3 layers; 1 the stamped image, 2 the anchor and ship elevated with foam tape, and 3 the ship elevated again with foam tape. https://www.scrapbook.com/galleries/155177/view /5793133...
I cut with a craft knife right on the line of the stamp. In your example I would re-stamp the image on another cardstock piece and cut out the girl, and maybe the fan, and then added it as a layer.
I know I 'm very late to the party here, but I would suggest making your edges more rounded rather than square. Your border width looks great but just round the edges of the corners and ends rather than making them straight. Hopefully that makes sense.
Mr Don't...I too am late to the party...lol...and think your card has nice dimension...but an added tip might help if you don't mind...I like edging my cut work with a chiseled marker to help image stand out and give a finished look. In this case I would use brown, I believe it would give it a more 3D look.
Peg ♥
Hi there my dear, I know that I'm late to the discussion and I hope you eventually get my post. There are sooooooooooo many styles and techniques when it comes to fussy cutting. I personally always start with a sketch of my project to get a clear perspective of what I'm going to be doing... in rare situations if I don't use a sketch I always get a clear concept in mind. I choose a color palette and know exactly what papers I'm going to use. This is all relevant because you can do so many cool effects, but not all will work best on the project you are working on. The way you fussy cut the image you posted would be perfect for a design with lots of strong geometric qualities to it. one of they keys to fussy cutting is having the right scissors or a talent with an x-ato (which I don't). I use a pair of EK Tools "Cutter Bee" scissors for just about everything and I try to keep a sharp pair on hand for detail work such as fussy cutting. Angel1dot0 gave awesome examples of the the basics. Don 1 mentioned a fantastic effect that's very easy to do by simple stamping one + or more images and then stacking them. Cutting as close to the edge in my opinion looks cleaner, but sometimes you want a fussy cut image that will fit certain embellishments you are going to use in a project and/or the feel of the piece. However, never lock yourself into looking at fussy cutting that there's a right or a wrong way to do it. With all art forms we must trust ourselves most of all when we make decisions like how to fussy cut and how complicated we're going to end up making it. As we learn more and more ways of doing things it all ends up in our toolbox. We have to be adventurous as an artist and be willing to try new ways of doing things with out too much fear to hold us back from experimenting. Happy crafting my dear!ðŸ˜