FREE Standard Shipping on Orders $69+ with code:
FREESHIPPING

Cheers
Give a Cheer

 Give a Cheer
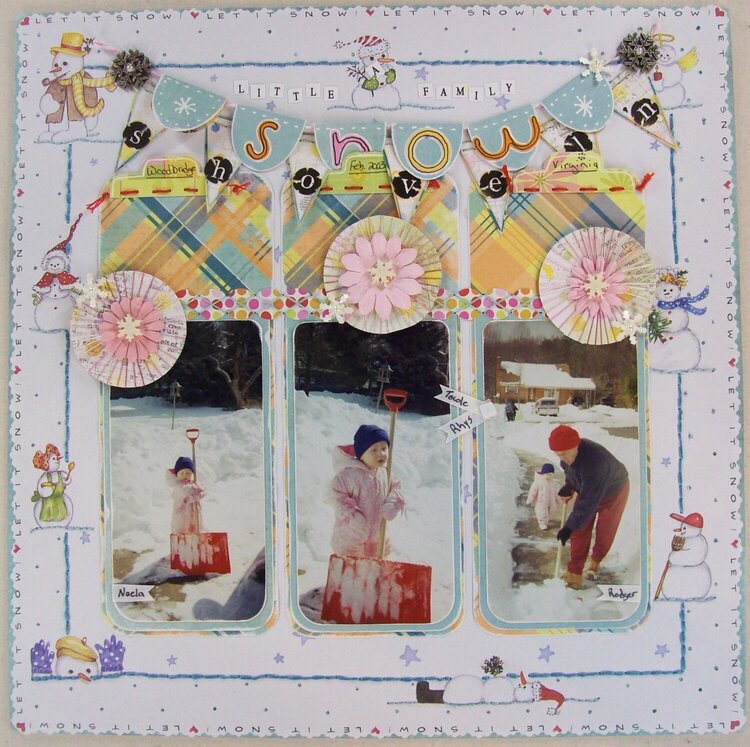
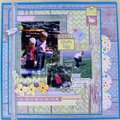
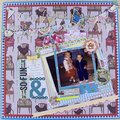
I used this sketch http://pinterest.com/pin/217932069438344368/ . I can't figure out where to see the original posting of the sketch, but it says it is by Pam Callaghan for GCD Studios.
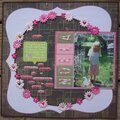
I started the lo with the background pp. I've had this paper for ever. To freshen the look of the pp, I used decorative scissors to trim around the edge, which allowed me to mat it onto a soft teal cs. I also covered the line border with some stitching using teal embroidery floss. I cut strips of the plaid pp and sanded the edges and adhered them to the page. I cropped the pics, rounded the corners and sanded the edges, then matted them on the blue paper (other side of the plaid), sanded the edges of the blue and adhered to the bottom of the plaid strips. I trimmed down a border strip and adhered it above the pics, then did a cross-stitch over it with embroidery floss. I cut circles from pp, then wrapped them with single strands of variegated pink embroidery floss. I adhered the circles to the page, added a flower and put a small acrylic snowflake in the center of the flower. I punched snowflakes from white cs, adhered them to the circles and added a pearl center. I added folder labels to the tops of the plaid strips, outlined them with a white pen, added the date and location with a black pen, and used red embroider floss to do a running stitch across each label.
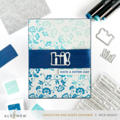
To make the banner, I cut triangles form pp and mated them onto the plaid pp and trimmed to leave just a small border. I added round alpha stickers, then stitched the triangle border to the page. I then used my Coluzzle to cut ovals from the blue paper, sanded the edges of each oval, folded the oval so that about 1/3 would fold over the pink/white backer's twine. I used the white pen to add details to the ovals. I adhered alpha stickers, outlined on the stickers with a black pen, then around the stickers with a white pen. I adhered the oval banner to the page, so that the ovals fell between the triangles. I added a metal snowflake to each end of the banner and added a pearl to the center of the metal snowflakes. I added another punched snowflake with pearl center to the banner. I used tiny alpha stickers to add the rest of the title above the banners and cut around the mitten on the snowman so that I could tuck the "A" behind it to look as though he were holding the letter. I added the names to the pics by cutting small pennants from white vellum and writing the names on them.
No products have been added to this project.

Thanks for spreading positivity!


November 09, 2012
October 29, 2012
October 24, 2012
October 24, 2012
October 21, 2012
October 17, 2012
October 11, 2012
October 10, 2012
October 10, 2012
October 10, 2012
October 09, 2012
October 08, 2012
October 08, 2012
October 08, 2012
October 08, 2012
October 08, 2012
October 08, 2012
October 08, 2012
October 07, 2012