Plus, a FREE Gift! | Details Here.


Note: This item is only compatible with power requirements that are the same as found in the United States and Canada. Consumers who purchase a different power source in any other part of the world will void the manufacturer's warranty.
Make your own photo pockets and sleeves using the brilliant Photo Sleeve Fuse by We R. Use it to seal in memorabilia, create the perfect pockets for odd-sized items, and add waterfall sleeves to layouts. The We R Fuse tool is so very easy to use!
Project Life scrapbookers will love the Fuse tool’s ability to squeeze just one more photo onto their pocket page layout – or a whole waterfall of can’t miss favorites. Or use the Photo Sleeve Fuse to encapsulate and attach a special piece of memorabilia so that both sides are viewable. Have odd sized photos? Divide a protector up into custom sized pockets with your We R Fuse tool.
For card makers, the Fuse Photo Sleeve tool is the quick and easy way to make custom shaker pockets for any card style or design. There will be no more envelopes full of escaped sequins when your cards shakers are sealed up tight with the Photo Sleeve Fuse!
Create beautiful mini-albums (and keep them that way) by using your Photo Sleeve Fuse to create custom sized page protectors for your album. Then add FUSEable collection embellishments to them for an extra layer of gorgeousness. Fuse them using the decorative Fuse tool tips in the FUSEables Fuse Tips accessory pack for extra detail!
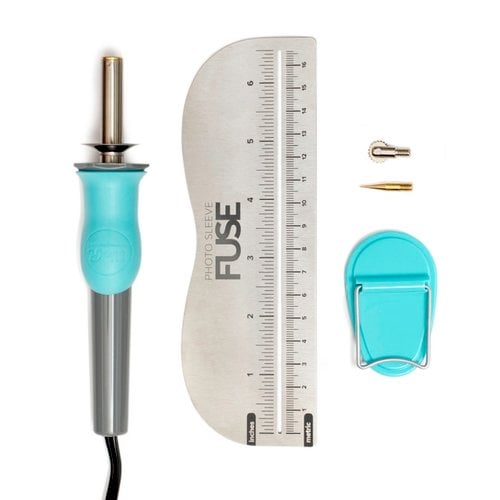
The included 6” metal Fuse tool ruler has measurements in metric as well as inches and features a wavy stencil edge for creating decorative edge pockets and shakers in addition to straight lines. The Fuse tool stand (also included) fits perfectly into a notch on the side of the We R Fuse tool for securely holding the Fuse while it heats, and folds flat for easy storage.
Package includes the We R Fuse tool, fusing & cutting Fuse tool tips, ruler with stencil edge, and tool stand.
Here’s just a sampling of what our Scrapbook.com customer reviews say for the We R Makers Fuse Photo Sleeve Tool:
“I just purchased the fuse and have made so many page protectors to conform to my way of scrapping. You will not regret this purchase!!!” – Tootles1108
“I really like it! It fuses the page protectors that I use really well and I've tried it on two or three different brands.” – mdteastman
“This is a GREAT tool to help with all paper crafting projects. I am so happy I made this purchase!!” – Debbie_D
“AWESOME TOOL! Perfect for my shaker card addiction.” – AZAmy
Compatible Fuse Tool Accessories: We R Makers FUSEables Mat & Holster, We R Makers FUSEables Fuse Tips, We R Makers FUSEables 12 inch ruler, We R Makers FUSEables Storage Box
FUSEable Materials: 12 x 12 clear sheets, 4 x 6 Waterfall Photo Sleeves, 3 x 4 Pocket Photo Sleeves, Instax Waterfall Photo Sleeves, 4 x 4 Waterfall Photo Sleeves, 2 x 2 Waterfall Photo Sleeves, Keepsake Pockets, FUSEable papers & embellishments
Product Contents: We R Makers Fuse tool, fusing & cutting Fuse tool tips, ruler with stencil edge, and tool stand
Fuse Instructions:
Screw the desired tip onto your We R Fuse (pointy for cutting, wheel for fusing). Place your tool securely on the included stand on a level surface and plug it in. Wait at least a full 10 minutes for the Fuse tool to heat before attempting to use it to cut or fuse.
Warning: The Fuse tool gets extremely hot – handle with care and keep away from small children and anything flammable!
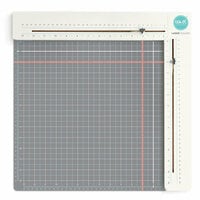
Place the material you will be working with on a heat resistant mat such as the We R Makers FUSEables Mat & Holster. Line up the item that you wish to fuse. Using the included Fuse tool ruler or the We R Makers FUSEables 12 inch ruler as a guide, press firmly and quickly slide the Fuse tool’s tip along the line to be fused.
Tip: Have multiple layers of material and you only want to cut or fuse some of them together? Place a piece of cardstock or chipboard behind the layers that you do want to fuse/cut, and the layers underneath the cardstock won’t be affected by the We R Fuse tool.
When your fusing is complete, be sure to unplug your We R Fuse tool. Allow the tool to cool for an extended period before attempting to remove the tip to change it, or putting the tool away.
For more instructions, tips and tricks on using the We R Makers Photo Sleeve Fuse tool, view our video below, read/ask questions or browse the ratings and reviews below too.
I came across this item on a YouTube video, and instantly wanted it! And it works like a charm. I can
make my own pockets to fit any size photo I have when scrapbooking; the Fuse also works really well for sealing party favors, pocket letters, anything! You do have to make sure however that the plastic you are working with is thick enough, otherwise it will poke a series of holes and not seal..
You create you own sized pockets in ANY page protector.
want to add some sand from the beach you visited?
create a 3 sided shape add the sand then seal the top shut. I have a number of large postcards that I wanted to be able to see both sides-descriptions on back.
before I was using brads to mount the postcard inside a page protector, pierced holes all the way through and used brads to hold in place (an ingenious idea I thought?.
with the fuser I can insert the PCs into the sleeve and fuse into place.
Do you get frustrated with items falling out of the top of your protectors? Fuse the top shut!!
As soon as this tool was available in the superstore I bought it and couldn't wait to play with it at home. Including the ruler guide was a fantastic idea and the instructions and clear and concise. That night I was able to create a planner shaker page with ease and it was super quick. This is my new favorite tool and would recommend to any and everyone!
Used in this project: Quote Planner Layout
I just got this tool and spent a lot of time playing and practicing with it. Very cool! It even seals cello bags so it's going to come in handy when I make little treat bags for my niece for school parties. It takes a little while to heat up and cool down but it's so worth it. You can seal in seconds and just about any shape imaginable. I'f I'm using it for a shaker card I can just seal using the outside edge of my die for a guide. I really like this thing!
Used in this project: Get Your Cake On Shaker
I struggle with having too many pictures of an event or subject to fit on a 1 or 2 page LO. Now I can add protectors in a waterfall by using the Fuse. I also have a project that I want to enclose the teeth that my kids lost as kids in a pocket with a letter written to the Tooth Fairy. Now that is easy with the Fuse. The options are endless. Super excited to see what everyone else makes with it.
I like this tool. I bought it primarily to have the roller attachment. I have other similar tools, but the ruler is a real improvement, and the wheel keeps the crafter from burning through plastic when making pockets.
I first saw this product being used on YouTube, purchased it and am so happy that I did!. You can do so much with this tool! If you want to buy this product and are not sure how it works, We R Memory Keepers have videos on YouTube, go see, go buy, you won't be disappointed!. Shipping was extremely fast! A+++. Return shopper for sure!!!
I purchased this tool and am so glad I did. It is one of those tools you have to have. Super easy to use and I am using some older plastic pages I have had and didn't know what to do with. Now I know! Buy it, I mean it! It is awesome!
I am very pleased with the fuse by We R Memory. Its a great, easy, fun "toy" to play with. This is the first time I've ordered from scrapbook.com and the customer service was excellent!! I would definitely recommend this to anyone!!
Just had time to play with new tool. Fairly easy to use. Just have to get it hot enough and then play away. I can see all sorts of possibilities. Used both tips. I think I will use the fuse most of all .
You must be signed in to comment. Please click here to sign in.


