
This article was written by Scrapbook.com founder and organizational expert Jill Davis. It also uses some methods and concepts developed by organizational guru Stacy Boatman. With Stacy's permission and help, we've included her concepts and experiences in this guide as well. You can also take the full, free class with multiple lessons and detailed photos. And, if you need them, you can get craft storage products here at Scrapbook.com to help.
Materials Needed When Organizing Projects-in-Progress and Kits
- Containers
- Files or large zip-style bags
- Label maker to label containers
The Projects-in-Progress and Kits Organizational Challenge
The goal of this organizational challenge is to gather all kits and unfinished projects into one location, and implement a system that will keep them contained until completed. You’ll decide on the system to help you get projects and kits started, and completed too.
This week's challenge is two-fold. First, it's to sort any unfinished layout, home décor piece, card, gift, or kit you own. Second, to organize these projects and kits into systems that will help you work on them regularly so they don’t fall through the cracks. This challenge is one Stacy and I both wrestled with for years, so if you struggle, you’re not alone.
In scrapbooking, we can hit an occasional creative roadblock. We work on a layout to near completion, but it needs something more to be finished. We’re not sure what it is so we set it aside. Where does that layout go in your studio? Where is your “aside?” Monthly kits come in the mail, or you purchase them from your local scrapbook store. Where do they get stored in your studio? How do you remember you have them? An altered project we started needs additional supplies, or more time to complete than we originally thought. We set it aside and lose interest. Do you have a shopping list for scrapbooking supplies? Where does it end up in your studio? These examples are projects-in-progress and in order to keep them from becoming clutter in our studios we need to have the following:
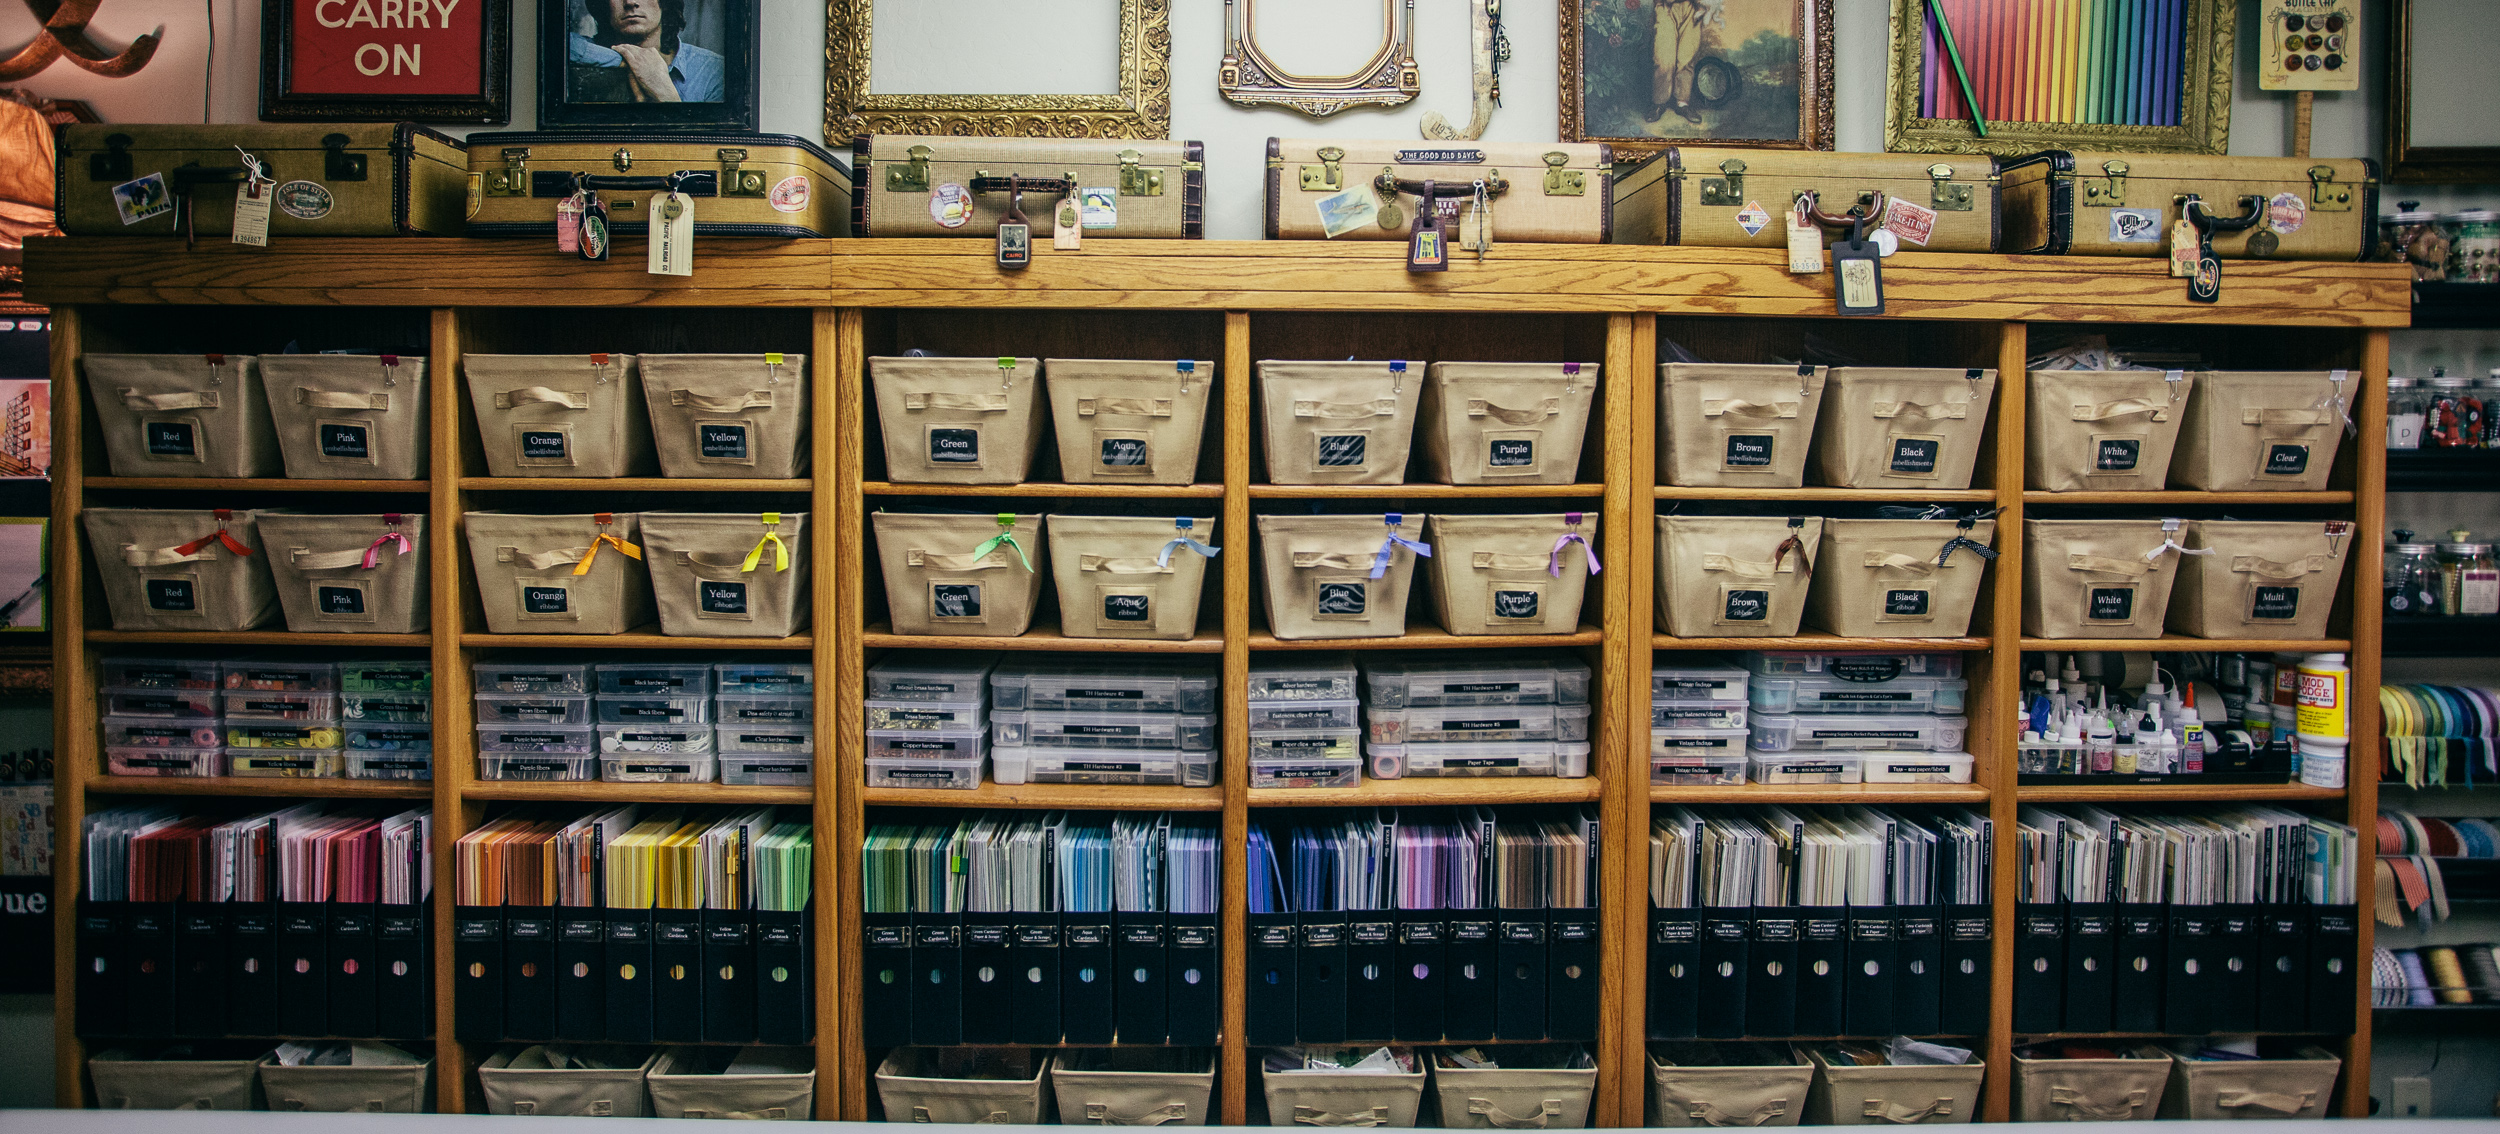
- Smaller containers where we store individual kits, layouts in progress, cards in progress and larger projects.
- A larger container or area where the smaller containers are stored until used.
- A way to remember what you have and what you need.
Shopping Lists for Unfinished Projects
Start a shopping list that contains every item needed to complete each project left unfinished. This list needs to always be in the same place; on your cell phone, by your grocery shopping list, on the wall in your studio, etc. It also needs to be portable, not written on a chalkboard, so you have it when you run errands, or shop online. Stacy suggests you take a picture of the contents of your bags and cases so you’ll know what you have, and what you still need to purchase before you start working on each project. She spreads the contents out on a table and takes a picture. If you use your cell phone, you’ll have the picture, and you can also add items to a shopping list on your phone to use when you’re at the store.
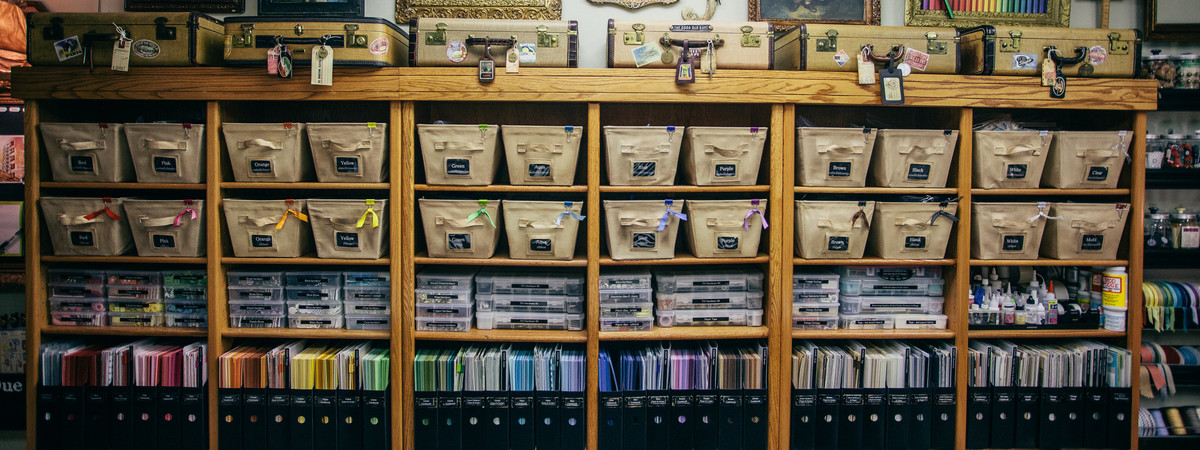
The Containers You'll Use to Store Unfinished Projects and Kits
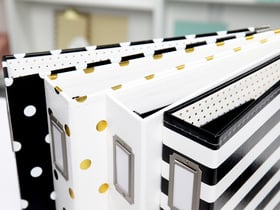
This system requires two types and sizes of containers. You’ll need one size and type to hold layouts or cards being worked on—one that you can get in and out of easily and doesn’t take up a lot of space when empty (or full). They will need to hold paper and some embellishments for up to a two-page spread. Stacy recommends zip-style bags. I’ve used page protectors and page arrangers. You’ll also need some larger containers or drawers to hold album supplies, home décor materials and some large kits. These containers can be the same zip-style bags if they will hold everything you need, if not, find something wider and deeper.
All of these containers will then need to be “contained” in a larger container. Small container options might include:
- Zip-style bags - 2 gallon or 13 x 15 (the thicker the plastic, the better)
- Craft Keepers or something similar
- Snap-top boxes
- Pizza boxes (new ones, not greasy left-over boxes from dinner)
- 3-drawer chest
- Page protectors
- Expandable files
- Paper Pouches
- Page Arranger
- Paper File
Note: Some containers are only deep enough to hold the paper for your layouts in progress. Others are deeper and a better container for projects with lots of embellishments, album kits, or 3-D altered projects. At the base of Stacy’s system are 13 x 15 zip-style bags, and deep storage containers. The zip-bags are large enough to hold papers and some supplies, and are thick enough not to tear.
The "Center" Of Your Projects-in-Progress and Kit Organization
The place you put all of your projects-in-progress can be a cabinet, canvas bins, fabric covered boxes, tiered or single skirt or pants hangers (to hang zip-style bags filled with supplies on a closet rod), stacking cubes, a filing cabinet, upright paper holders, or a shelf with heavy-duty book ends that are capable of holding a fluctuating stack of packets. Make sure these containers have room to grow, and decide where in your space they will be located. It’s a good idea to keep all of your projects-in-progress in the same area to make life easier. If you decide to use page protectors to hold layout supplies, look into sturdy 3-ring binders to hold them in. Stacy chose vertical paper holder storage to hold her zip-style 13 x 15 bags. She says her supplies fit inside beautifully and they aren’t too heavy when full.
The Motivator
Both Stacy and I have similar systems for storage and organization but we have different systems to help us keep track of our projects. I use a system explained in “More Insight” below, and Stacy uses a “Start Here" jar. Here's how the "Start Here" jar works:
“Start Here” Jar Supplies:
- A small can or jar to hold the popsicle sticks upright.
- Popsicle sticks from a craft store.
- We R Memory Keepers Crop A Dile hole punch or drill to make a hole in one end of each popsicle stick for an optional ribbon tie.
- Ribbon (for the optional tie in the hole of each popsicle stick)
- A label maker (which might be permanently attached to your hip by now)
Set Up Your "Start Here" Jar:
You’ll need one popsicle stick for every project bag and project case you have. To make the sticks:
- Punch a hole with the We R Memory Keepers Crop A Dile hole punch in the end of each stick (please put a thick piece of wood under the sticks when you drill so you don’t drill into your table).
- String a piece of ribbon through the hole and tie it in a knot for decoration (optional).
- Label a stick for each project container you have. For each number on your bags or box put the corresponding number on a popsicle stick.
- Once you have all your sticks labeled, put them in the jar the next part of your system.
You should have a #1 popsicle stick, #2, #3, etc. which will never change. Then you’ll have other sticks labeled with larger projects, i.e. “Baby Album” (for example).
Tip: Use your label maker so you don’t have to make a new stick every time you finish the project and reload the bag or case. This jar full of sticks is going to be your little scrap angel who gets you moving in the right direction when you don’t know where to begin to work in your studio.
You know those moments when you have two hours of freedom and you walk into your CLEAN studio, and think “Oh my goodness, where do I start?” Well, now you’ll have your “Start Here” system to help you get going so you don’t waste time. Instead, you’re going to randomly pull a stick out of your container and do what it says.
Say your stick says “#6.” You’ll go to your bins and grab bag #6. It may be a layout kit you got in the mail a few months ago, so you’ll get some pictures out of your picture files and create a layout. Or #6 might be the page you set aside last year.
Work each project as long as you have time, and then re-file it when your time is up. Once the file bag or case is cleared out, recycle that bag for the next project or page. If you’re “not feeling” the project you picked, grab another stick that does pique your interest. You don’t HAVE to use the sticks every time you work but you will now have a system that is organized and will help you get things done. This system is a great way to prepare projects you want to take to crops, too.
Now, I’m sure there are those of you who are questioning “Why do all of this work?” Or, “Can’t I just pick out a bag and get going?” Or, “Isn’t it just as effective to keep a list in my day planner or on my cell phone?” Of course you don’t need decorated popsicle sticks to nudge you along; it’s just a creative idea that is a possibility. However, having a reminder somewhere that is functional (on your phone, the calendar, etc.) is how out-of-sight projects get in front of you so they get worked on.
More Insight (My take on a "Start Here" jar)
My projects-in-progress center has several components because it also includes work-related projects and assignments. One of those components is my take on a “Start Here” jar.
Instead of popsicle sticks I have a motivation center on the wall that I see when I enter my studio. The center is a frame with a magnetic surface that holds 33+ embellished ATC-size cards with magnets on the back. Even If I never read what’s on the cards, they are great eye candy for embellishing ideas. I added extra pockets, tags or flaps to each card to hold the information that would be on a popsicle stick, plus inspiring information and some maintenance items.
Every morning when I enter my studio, I remove one card from the magnetic frame. It has a motivational quote, one nice reminder of something I should do for my health, the number to an unfinished project, and one maintenance item that needs to be done in my studio on a monthly basis. Sometimes I need extra reminders to keep me, and my studio, in shape.


My Projects In Progress System
After reading the card, I move to my Scrapbook.com assignment boxes and get the materials I need to work on that day. Anything in my assignment box is what I address first. If I need to finish up a work project I was working on the day before, I go to my projects in progress tower where it will be on a tray (or it may still be on my workspace). If I don’t have deadlines pressing I get to work on the items on my card. I find that on the days I work on deadlines, the possibility of taking a break to do the items on my card keeps me excited and working at a steady pace.
An integral part of my projects-in-progress system is my “In” and “Out” bins and the two work assignment bins that hang on the wall as I enter my studio. They have chalkboard fronts so I can change dates and make notes. When something comes into my studio (new product, mail, etc.) it goes into my “In” Box (I clean this out daily). Completed assignments that go to the office and outgoing mail go in my “Out” box. Work assignment materials go into one of the numbered assignment bins and I write the deadline date by its corresponding number on the chalkboard front.


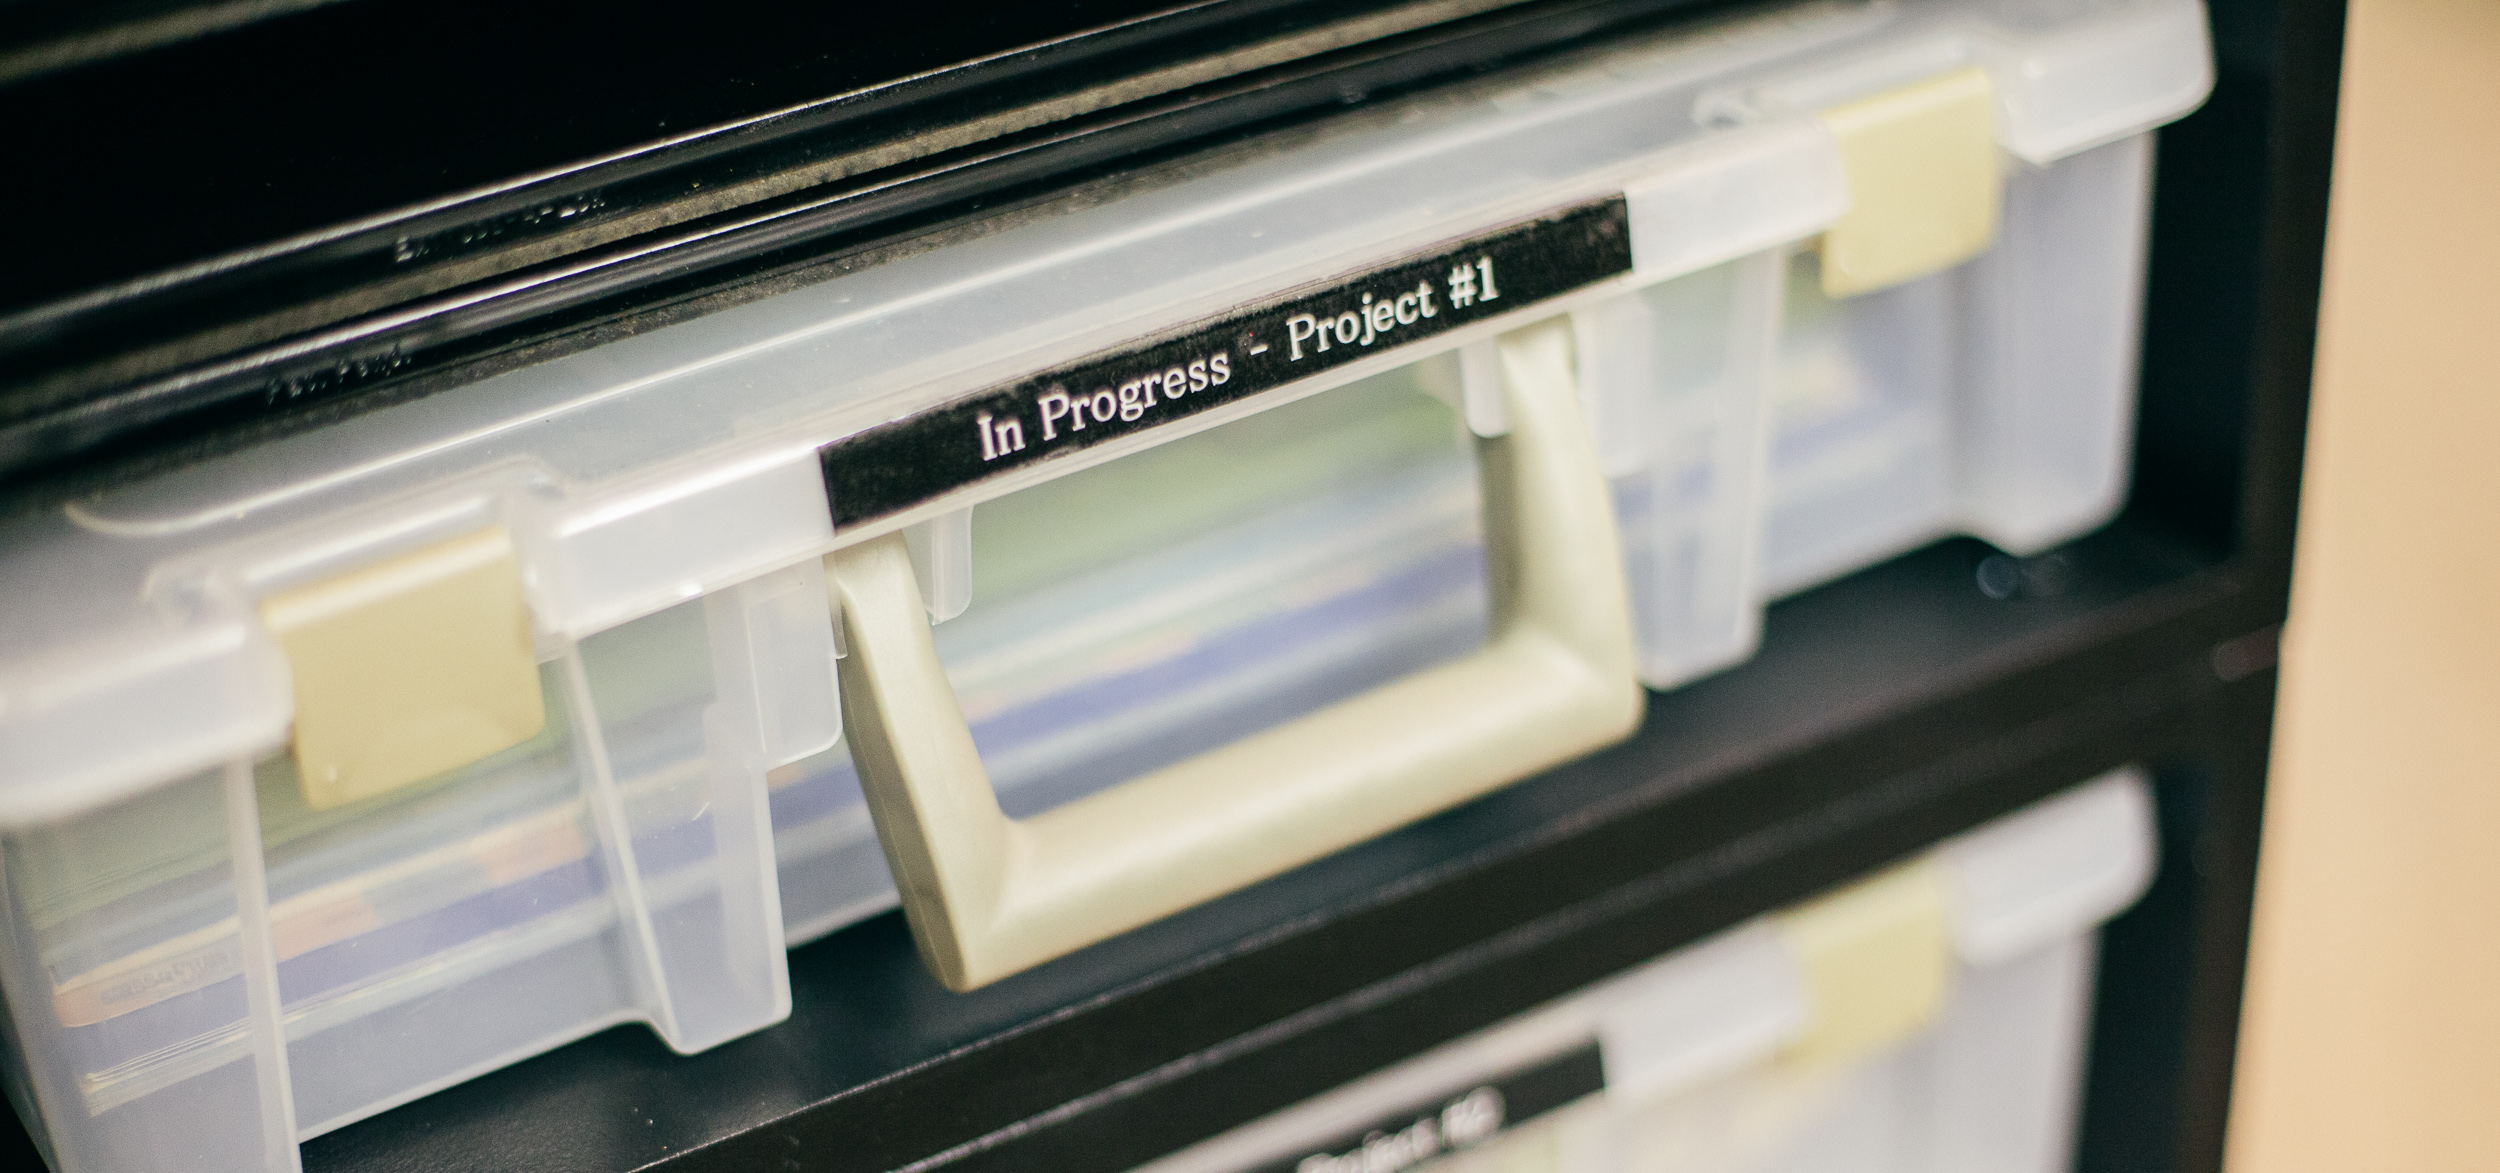


My project tower is the hub for most projects. The top cube holds binders full of layouts for albums in progress, and numbered Storage Studios containers for layouts and cards in progress.
The second cube has pull-out trays that can hold layouts or projects I have quickly cleaned-up and will get back to within a day or two. These are VERY temporary holding trays. The third cube holds labeled ArtBin satchels for projects. Album kits from kit clubs are in numbered zip-style bags in a crate I purchased at The Container Store. I also have some bins and drawers in a shelf that hold seasonal supplies and projects.
I have four of my six suitcases available for themed gift albums (more than one album for my friends and family or materials for our perpetual ABC albums).
When I need to get a new perspective on layouts I’m working on, I hang them from one of my layout displays to get a better look. They may hang there for a few hours, days or even weeks; whatever it takes to get the inspiration and perspective needed to get them completed.


Jill's 25 "Start Here" Motivational/Maintenance Card Subjects
Every morning when I enter my studio, I remove a card from a magnetic frame. On the card is a one motivational quote, one health related reminder, the number to an unfinished project, and one maintenance item that needs to be done in my studio on a monthly basis. Sometimes I need extra reminders to keep me and my studio in shape. Below is a list of 25 possible subjects you too can use on your motivational/maintenance cards:
- Clean and sharpen scissors
- Scan 20 heirloom photos
- Sharpen dull pencils
- Update personal items
- Re-ink dry ink pads
- Dust North wall
- Dust South wall
- Dust East wall
- Dust West wall
- Dust island inside and out and clean top
- Wipe off floor mats and vacuum
- File 50 printed photos into albums or photo drawers
- Print out 40 photos at home, online, or at a photo printing center
- Straighten six bins in embellishment center
- Clean out four drawers in the drawer tower
- Straighten Projects-in-Progress and Kit bins
- Straighten ribbon organizers
- Clean chalkboards and change motivational cards
- Update idea books
- File 50 digital photos
- Clean out tool and adhesive carousels
- Clean and replenish totes
- Order supplies like cardstock, ink, adhesive, etc.
- Update and add favorites to my account at Scrapbook.com for 20 minutes
- Put away contents of odds-and-ends bowl (a bowl on my island that is the catch-all and quick-clean-up for items I don’t have time to put away for the day)Straighten centers: office, sewing, stamp, embellishments, in-boxes
*You may repeat any of the items above to achieve 30-31 total items if you’re setting up a “daily-style” calendar of tasks.
Summary
The point of having a studio is to have a place where you can have fun while working on projects.
If you are looking to further enhance your organizational craft space organizational skills, check out these four informative articles here, here, here, and here!
Want to share your idea organizational system with others so you can help spread the good organizational word? Post your images into the Scrapbook.com Gallery, and don't forget to tag #LifeHandmade and #Scrapbookcom!
This article is part of our free class called Get Organized. To further expand on your craft space organizational skills, sign up and take the class for free here!