


If you've ever turned the handle on your die cutting machine and wondered whether you're doing it correctly, you're not alone.
Whether you're brand new to die cutting or you've been crafting for years, every die cutting machine operates on the same principle:
Die cutting and embossing are a game of pressure.
When pressure is balanced correctly, your machine feels smooth and steady. When it’s not, you'll notice it immediately... incomplete cuts, cracked paper, loud creaking, warped plates, or a sandwich that feels like it's fighting back.
The goal is simple: Pack the right sandwich.
When crafters reference the "sandwich" they are referring to the layered stack of plates, paper, and a die or embossing folder that you feed through your machine to create pressure. As you crank your sandwich through, you should feel firm resistance, not a struggle. The handle should turn steadily, not jerk or stall. When you remove your project, the paper should be cleanly cut or crisply embossed and ready for your card, layout, or creative project.
If that’s not happening, this guide will help you diagnose why and fix it.
Below, you'll find a complete troubleshooting reference organized by common problems. Jump directly to what you're experiencing, or review key die cutting terms in the glossary if you're newer to the process.

Jump to Your Problem
My Sandwich Or Pressure Feels Wrong
- My Sandwich Won't Feed / Feels Like a Speed Bump
- My Machine Is Suddenly Harder to Crank Than Before
- My Machine Creaks
- Why Is My Machine So Loud?
- My Machine Feels Loose or Slips
- Why Does My Die Cut Machine Smell?
My Die Is Not Cutting Cleanly
- My Die Didn't Cut All the Way Through
- My Intricate Die Leaves Tiny Uncut Spots
- My Steel Rule Die Won't Cut Cleanly
- My Vellum Isn't Cutting Cleanly
- My Glitter Cardstock Won't Cut Cleanly
- My Patterned Paper Is Tearing Instead of Cutting
- My Sentiment Die Cuts but Letters Tear
- My Die Cuts but Won't Separate Cleanly From the Backing
- My Cuts Look Jagged or Fuzzy
- My Die Is Cutting Through My Plate Too Deeply
- My Dies Have Lost Their Sharpness — Can I Sharpen My Dies?
My Die Cut Is Stuck Or Shifting
- My Die Cut Is Stuck in the Die
- My Die Shifted While Cutting
- My Die Is Cutting Crooked
- My Frame Die Cuts but the Inside Piece Is Off
My Embossing Isn't Working Right
- My Embossing Is Too Light
- My 3D Embossing Isn't Deep Enough
- My 3D Folder Flattened My Paper Instead of Embossing
- My Embossing Folder Left Lines Around the Edge
- My Paper Creased When Embossing
- My Paper Cracked (White Core Showing)
- My Cardstock Is Peeling After Embossing
- My Spritzed Paper Warped Instead of Embossed
- My Ink Smudged Inside the Embossing Folder
- My Foil/Metallic Paper Looks Scratched After Embossing
3D Embossing Folder Problems
- Do 3D Embossing Folders Need a Different Sandwich?
- My 3D Embossing Folder Is Too Thick to Fit
- My Embossing Folder Is Cracking at the Hinge
My Plates Are Warping Or Wearing Out
- My Plates Are Warped — How Warped Is Too Warped?
- My Plates Warp Immediately
- My Cutting Plates Are Cloudy — Are They Ruined?
- My Plates Stick Together After Cutting
Adhesive And Residue Problems
- My Adhesive-Backed Paper Is Gumming Up My Die
- How Do I Clean My Dies Safely?
- How Do I Clean My Embossing Folders?
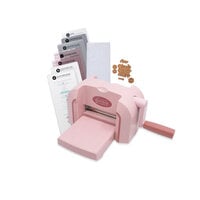
Sandwich Recipes By Machine
- What Sandwiches Work for the Sizzix Big Shot?
- What Sandwiches Work for the Big Shot Switch Plus?
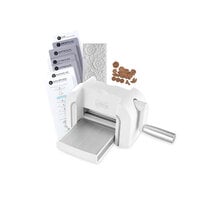
- What Sandwiches Work for the Spellbinders Platinum 6?
- What Sandwiches Work for the Platinum Scout?
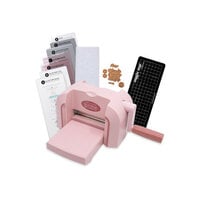
- What Sandwiches Work for the Anna Griffin Empress or Empress Elite?
- What Sandwiches Work for the Empress Mini?
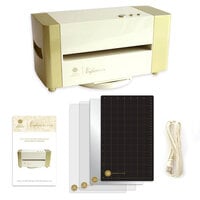
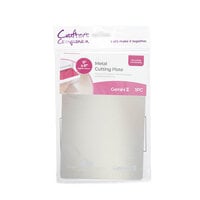
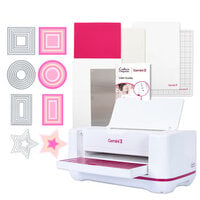
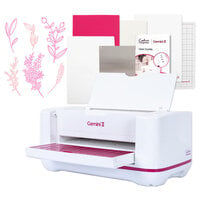
- What Sandwiches Work for the Gemini II?
- What Sandwiches Work for the Gemini II Jr.?
- What Sandwiches Work for the Gemini Pro?
- What Sandwiches Work for the Gina K Intri-Cut?
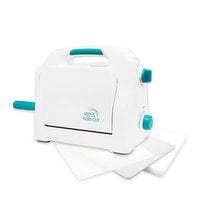
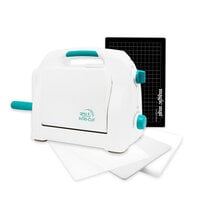
- What Sandwiches Work for the Sizzix Sidekick?
Look Up Terms In The Glossary
Pressure & Sandwich Terms
- Sandwich
- Pressure
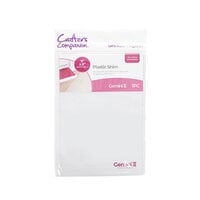
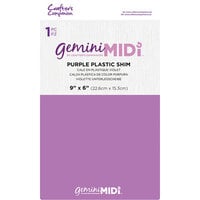
- Shim
- Speed Bump Effect
Machine & Plate Terms
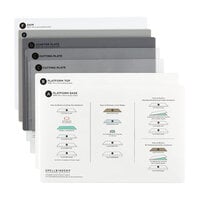
- Platform (Base Plate)
- Cutting Plate
- Warped Plate
- Cutting Plate Grooves
- Magic Mat
- Roller System
Die Types & Cutting Terms
- Thin Metal Die
- Steel Rule Die
- Cutting Edge (Blade Down)
- Release Paper
- Pokey Tool
Embossing Terms
- Emboss
- Deboss
- 2D Embossing Folder
- 3D Embossing Folder
- Hinge-First (Chomp First)
Paper & Material Terms
- Solid-Core Cardstock
- White-Core Cardstock
- Coated Cardstock
- Specialty Cardstock
My Sandwich or Pressure Feels Wrong
If your die cutting machine doesn’t feel right, trust that instinct.
Before you even look at your paper results, your machine usually tells you something is off. The sound, the resistance, and the way the sandwich feeds are all pressure signals. This section focuses on how the machine behaves while you’re cranking. Later sections will address what happens to your paper (incomplete cuts, cracking, embossing depth, plate wear, and more).
Let’s diagnose what you’re feeling.
My Sandwich Won’t Feed / Feels Like a Speed Bump
If your sandwich hits the rollers and feels like it slams into resistance, the pressure is uneven at the leading edge.
Likely causes:
- The stack is slightly too thick.
- Layers aren’t aligned flush (a “stair-step” edge).
- Paper extends beyond the edge of an embossing folder.
- Warped plates are creating uneven entry pressure.
Quick fixes:
- Align all layers evenly before inserting.
- Slightly angle the sandwich so one corner enters first.
- Trim paper so it fits fully inside embossing folders.
Helpful products:
Magic Mat (when compatible) to help distribute pressure differently
My Machine Is Suddenly Harder to Crank Than Before
If your machine used to crank smoothly and now feels noticeably tighter, something changed in your pressure stack.
Likely causes:
- You added thickness (extra shim or an incorrect sandwich).
- You switched to a 3D folder without adjusting your stack.
- You’re using thicker or specialty materials (glitter, adhesive-backed, heavy cardstock).
- Your plates have warped and are stacking pressure unevenly.
What to do:
- Stop immediately.
- Reverse the handle.
- Rebuild your sandwich intentionally.
- Remove one layer and test again.
Helpful products:
Shim set (plastic or metal) for controlled pressure adjustments
New cutting plates if warping is causing sudden tightness
My Machine Creaks
Some creaking is normal because you’re compressing plastic plates under pressure. But creaking paired with jerking motion or aggressive bowing usually means the sandwich is too thick.
Warning signs:
- Aggressive plate bowing
- Grinding or stalling
- Sudden loud popping sounds
If you notice these, stop, reverse, and remove thickness. Repeated over-pressure shortens plate life.
Helpful products:
Replacement plates if bowing is severe
Magic Mat (for intricate dies) to reduce deep plate gouging over time
Why Is My Machine So Loud?
Manual machines make some sound, but sharp cracking or sudden aggressive noise often indicates too much thickness, an incorrect 3D embossing sandwich, or severe plate warping.
If the sound changed after switching materials or folder types, suspect your sandwich configuration first. (This guide covers 3D folder adjustments and plate diagnostics later.)
My Machine Feels Loose or Slips
If the handle feels unstable or the machine shifts while cranking, this is usually a setup issue, not a die issue.
Check:
- Is the machine on a stable surface?
- Are the suction cups or rubber feet secure?
- Are you feeding straight (or only slightly angled), not forcing at an extreme angle?
Helpful products:
Non-slip craft mat to stabilize the base
Replacement feet/suction cups (machine-specific)
Why Does My Die Cut Machine Smell?
A faint plastic smell can happen under heavy pressure (especially with new plates), but a strong or persistent smell can indicate excess friction or repeated forcing of too-thick stacks.
If you smell something unusual, stop immediately, reduce thickness, and let plates cool if needed.
My Die Is Not Cutting Cleanly
If your machine feels fine — but your paper result isn’t clean — this is usually a pressure distribution issue, not a machine failure.
Clean die cutting requires three things:
- Balanced pressure
- Even plate contact
- Proper material pairing
This section focuses on paper results. If your machine feels strained or loud, revisit the previous section on sandwich and pressure first.
Let’s diagnose what’s happening on the paper.
My Die Didn’t Cut All the Way Through
This is the most common die cutting problem.
Likely Causes:
- Sandwich slightly too thin
- Uneven plate wear (pressure “hot spots”)
- Die positioned over a heavily grooved area
- Intricate design requiring more compression
What to Try:
- Add a thin shim (copy paper is a good starting point)
- Rotate or flip your cutting plates
- Move the die to a less worn area
- Run it through a second time (only if it feeds smoothly)
If incomplete cuts are happening mostly with detailed designs, see the next section.
My Intricate Die Leaves Tiny Uncut Spots
Delicate dies require extremely even pressure.
Why This Happens:
- Fine lines don’t receive uniform compression
- Plate warping creates pressure gaps
- Cardstock is too thick for that design
What to Try:
- Add a very thin shim
- Use a die brush tool to clear small cut areas
- Rotate plates frequently to avoid hot spots
We’ll cover die release issues more deeply in the “Die Cut Is Stuck” section.
Helpful Products:
Magic Mat (if compatible with your machine)
Die brush tool to loosen clear small cut areas
My Steel Rule Die Won’t Cut Cleanly
Steel rule dies are thicker and behave differently than thin metal dies.
Likely Causes:
- Incorrect sandwich (too much layering)
- Over-padding the stack
- Dull foam ejection surface
Steel rule dies typically need fewer layers than thin metal dies. Check your machine-specific sandwich recipe before adding shims.
Helpful Products:
New cutting plates if compression is uneven
My Vellum Isn’t Cutting Cleanly
Vellum is flexible and fibrous — it can tear instead of slice.
What Helps:
- Use sharp, clean dies
- Avoid overly worn cutting plate areas
- Add minimal extra pressure (very thin shim)
- Run through once smoothly rather than forcing
Vellum cutting issues are material-related, not usually machine-related.
Helpful Products:
Replacement cutting plates
My Glitter Cardstock Won’t Cut Cleanly
Glitter cardstock is thick and textured.
Common Causes:
- Insufficient pressure
- Worn plates
- Intricate dies struggling with texture
What to Try:
- Add one sheet of copy paper as a shim
- Rotate plates
- Run through twice if it feeds smoothly
We’ll talk more about plate wear in the plate section later.
My Patterned Paper Is Tearing Instead of Cutting
Patterned paper often has a printed surface layer over a softer core.
Likely Causes:
- Dull die
- Too much pressure (crushing rather than slicing)
- Paper grain direction
What to Try:
- Flip paper and test direction
- Reduce thickness slightly
- Check for adhesive residue on die
Adhesive buildup is covered in the cleaning section later.
Helpful Products:
Replacement plates
Adhesive remover
My Sentiment Die Cuts but Letters Tear
Thin script dies are especially sensitive.
Causes:
- Too much pressure
- Too much shim
- Intricate connection points stressed during removal
What to Try:
- Remove excess shim
- Gently remove with pokey tool
Avoid forcing removal — we’ll discuss stuck die cuts in the next section.
Helpful Products:
Pokey tool
My Die Cuts but Won’t Separate Cleanly From the Backing
This often overlaps with adhesive-backed materials or intricate designs.
Likely Causes:
- Adhesive residue
- Extremely tight tolerances in design
- Not enough clearance
See the upcoming section on “Die Cut Is Stuck or Shifting” for removal techniques.
Helpful Products:
Die brush tool
Adhesive remover
My Cuts Look Jagged or Fuzzy
Clean cuts should look crisp, not shredded.
Causes:
- Dull die
- Over-compression
- Damaged cutting edge
- Cutting into deep plate gouges
Try:
- Rotating plates
- Using a less grooved surface
- Reducing excess shims
My Die Is Cutting Through My Plate Too Deeply
All plates develop cut marks. That’s normal.
But deep gouges indicate:
- Excessive pressure
- Too many shims
- Incorrect sandwich
If grooves are severe, they can affect pressure distribution. We’ll discuss plate replacement guidelines later.
Helpful Products:
Replacement cutting plates
Magic Mat (to reduce repeated deep grooving in some setups)
My Dies Have Lost Their Sharpness — Can I Sharpen My Dies?
Thin metal dies aren’t designed to be sharpened like knives. You can’t grind them back to a brand-new edge.
Before replacing a die, make sure it’s actually dull — not just dirty.
Step 1: Clean the Die
- Tiny paper fibers stuck in the design
- Adhesive buildup from sticker or foam-backed paper
Use a pokey tool and a stiff brush (or die brush tool) to remove debris. Often, this alone fixes the issue.
Step 2: Try the Aluminum Foil Method
This won’t truly sharpen the die, but it can remove microscopic burrs and improve performance.
How to do it:
- Fold heavy-duty aluminum foil into 3–4 layers.
- Place the die blade-down on the foil.
- Run it through your machine 3–4 times.
- Run wax paper or parchment paper through once afterward to reduce friction.
Important Notes:
- Avoid coarse sandpaper — it can damage the cutting edge.
- If a die still won’t cut cleanly after cleaning and pressure adjustments, it may need replacement.
- Surface rust can be gently wiped away with white vinegar and fully dried.
Helpful Products:
Die brush tool
Pokey tool
Adhesive remover
Replacement dies (if wear is confirmed)
My Die Cut Is Stuck or Shifting
If your die did cut, but now it is stuck, crooked, or misaligned, the issue is usually friction, movement, or alignment rather than pressure alone.
This section focuses on what happens during or after the cut:
- The paper will not release
- The die moved during the pass
- The design cut off-center
- The inside of a frame does not line up
My Die Cut Is Stuck in the Die
Intricate dies are designed with tiny release holes for a reason. Small details can grip the paper tightly after cutting.
Likely Causes:
- Very detailed or delicate design
- Cardstock thicker than ideal
- Static cling or adhesive buildup
What to Try:
- Gently tap the die against your work surface
- Use a pokey tool through the release holes
- Run wax paper or release paper between the die and cardstock next time
- Use a die brush tool to loosen small pieces
If adhesive residue is contributing to the problem, see the cleaning section later in this guide.
Helpful Products:
Pokey tool
Die brush tool
My Die Shifted While Cutting
If your die moved during the pass, you may notice shadow lines, double cuts, or misaligned shapes.
Likely Causes:
- Die not secured before feeding
- Sandwich entered rollers unevenly
- Excessive angling during feeding
- Very smooth cardstock surface
What to Try:
- Use low-tack tape to secure the die before running it through
- Feed the sandwich straight or only slightly angled
- Avoid forcing the stack into the rollers
This is different from crooked cutting caused by plate warping, which is covered in the plate section later in the guide.
Helpful Products:
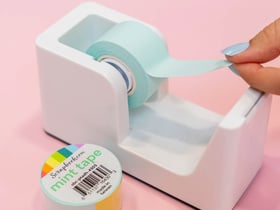
Low-tack mint tape
Non-slip craft mat
Replacement cutting plates if uneven pressure is contributing
My Die Is Cutting Crooked
If your cut is consistently slanted or uneven, this usually points to pressure imbalance or alignment issues.
Likely Causes:
- Warped plates
- Feeding at a harsh angle
- Uneven stacking of the sandwich
- Die placed over a deeply grooved plate area
What to Try:
- Rotate or flip your cutting plates
- Rebuild the sandwich carefully with flush edges
- Feed straight instead of aggressively angled
- Test the die in a different area of your plates
If the issue continues across multiple areas of the plate, review the plate warping section later in this guide.
Helpful Products:
Replacement cutting plates
My Frame Die Cuts but the Inside Piece Is Off
Frame dies, especially nested sets, rely on precise alignment. If the outer frame cuts correctly but the inner opening is shifted, something moved during the pass.
Likely Causes:
- Die not secured to the cardstock
- Paper shifting within the sandwich
- Multiple dies not taped together
- Plate movement during feeding
What to Try:
- Tape nested dies together before placing on paper
- Secure dies to cardstock with low-tack tape
- Build the sandwich carefully and align edges flush
- Avoid lifting plates until the sandwich is fully removed
This issue is usually about stability rather than pressure.
Helpful Products:
Low-tack mint tape
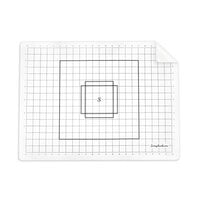
Alignment grid mat
My Embossing Is Not Working Right
If your embossing looks faint, uneven, cracked, or distorted, the cause is usually one of four things: the sandwich is the wrong thickness, the paper is the wrong type (or too dry), the folder type is mismatched (2D vs. 3D), or the paper is not sized or positioned correctly in the folder.
This section focuses on paper results and folder behavior. If your machine feels strained, loud, or hard to crank, review your sandwich thickness and your machine-specific sandwich recipe first.
My Embossing Is Too Light
If the design looks faint or flat, you likely do not have enough pressure for the folder and paper combination.
Likely Causes:
- Sandwich slightly too thin
- Plates are heavily worn in the area you are using
- Paper is too dry, soft, or textured to hold detail
- Folder needs a different sandwich than you are using
What to Try:
- Add a thin shim, starting with one sheet of copy paper
- Rotate or flip plates and try a less worn area
- Confirm the folder type and the correct sandwich (2D vs. 3D)
- For stubborn results, lightly spritz cardstock and let it sit 10 to 20 seconds before embossing. This makes the paper more flexible.
Helpful Products:
Shim set (plastic or metal for controlled pressure increases)
Replacement cutting plates
Fine mist spray bottle
My 3D Embossing Isn’t Deep Enough
3D embossing folders are designed to create deeper detail, but they usually require a specific sandwich. If the result is shallow, the stack may be too thin or the folder may not be contacting evenly.
Likely Causes:
- Incorrect 3D embossing sandwich for your machine
- Not enough overall pressure
- Plates warped or worn, creating uneven contact
- Paper too lightweight to hold deep detail
What to Try:
- Confirm the correct 3D embossing sandwich for your specific machine
- Try a slightly thicker cardstock that can hold texture
- Lightly spritz cardstock and wait 10 to 20 seconds for moisture to distribute
- Rotate plates and test a different area
Helpful Products:
Fine mist spray bottle
Replacement plates
My 3D Folder Flattened My Paper Instead of Embossing
If the paper comes out pressed flat with little definition, the folder may not be receiving the correct type of pressure, or the paper may be too soft for the depth of the design.
Likely Causes:
- Wrong sandwich configuration for a 3D folder
- Stack too thin, so the folder does not press evenly
- Paper too soft, textured, or lightweight for a deep folder
What to Try:
- Switch to the correct 3D embossing sandwich for your machine
- Use a sturdier cardstock that can hold deep detail
- Lightly spritz cardstock and allow it to rest briefly before embossing
Helpful Products:
Fine mist spray bottle
Quality cardstock suited for embossing
My Embossing Folder Left Lines Around the Edge
Edge lines usually happen when the paper is larger than the folder design area or the pressure is too high. The folder edges can leave an imprint when they press into unsupported paper.
Likely Causes:
- Paper extends beyond the folder interior
- Sandwich too thick for the folder type
- Folder not centered or fed unevenly
What to Try:
- Trim paper to fit fully inside the folder
- Reduce thickness slightly by removing a shim or extra layer
- Center the folder and feed straight
Helpful Products:
Paper trimmer
My Paper Creased When Embossing
Creases usually come from uneven pressure, paper overhang, or an overly thick stack.
Likely Causes:
- Paper extends past the folder edge and gets pressed unevenly
- Sandwich too thick
- Folder entered the rollers unevenly
What to Try:
- Trim paper to fit inside the folder
- Reduce thickness by removing one layer at a time
- Feed the folder straight or only slightly angled
Helpful Products:
Paper trimmer
My Paper Cracked (White Core Showing)
Cracking happens when dry cardstock is compressed deeply. White-core cardstock makes cracks more noticeable because the white center shows at the fold or raised areas.
Likely Causes:
- Cardstock too dry for deep embossing
- Too much pressure, especially with 3D folders
- White-core cardstock showing through when fibers split
- Coated or specialty cardstock that does not flex well
What to Try:
- Lightly spritz cardstock and wait 10 to 20 seconds before embossing
- Use solid-core cardstock if cracks bother you visually
- Reduce thickness slightly and confirm you are using the correct 3D sandwich
- Try a different cardstock designed for embossing
Helpful Products:
Fine mist spray bottle
Solid-core cardstock
My Cardstock Is Peeling After Embossing
Peeling or flaking often happens with coated papers when the top layer separates under pressure.
Likely Causes:
- Coated or glossy cardstock separating under pressure
- Too much moisture from spritzing
- Too much pressure for that paper type
What to Try:
- Use less moisture or skip spritzing for coated stock
- Reduce pressure by removing a layer
- Test on an emboss-friendly cardstock designed to hold texture
Helpful Products:
High-quality cardstock
My Spritzed Paper Warped Instead of Embossed
Warping means there was too much water or the moisture did not distribute evenly before embossing.
Likely Causes:
- Too much water applied
- Spray was uneven or too close to the paper
- Paper did not rest long enough for moisture to spread
What to Try:
- Use a fine mist and spritz once or twice from 8 to 12 inches away
- Let paper rest 10 to 20 seconds before embossing
- Blot lightly if paper feels wet rather than lightly damp
Helpful Products:
Fine mist spray bottle
Absorbent paper towel for quick blotting
My Ink Smudged Inside the Embossing Folder
Smudging usually happens when ink is not fully dry or when residue is transferred from a prior technique.
Likely Causes:
- Ink not fully dry or cured
- Folder has leftover ink, paste, or embossing residue
- Moisture from spritzing reactivated ink
What to Try:
- Allow ink to dry completely before embossing
- Use a clean, dry folder
- Avoid spritzing inked paper unless the ink is fully set
Folder cleaning tips are covered in the cleaning section later in this guide.
Helpful Products:
Microfiber cloth
My Foil/Metallic Paper Looks Scratched After Embossing
Metallic and foil papers show every scuff. Scratches often come from debris, worn plates, or residue on the folder.
Likely Causes:
- Debris on plates or inside the folder
- Deep plate grooves transferring marks
- Residue from ink or paste on the folder
- Too much pressure for delicate foil surfaces
What to Try:
- Wipe plates and folder clean before embossing
- Use a less worn area of your plates
- Reduce thickness slightly if the paper is scuffing
Helpful Products:
Replacement cutting plates
Microfiber cloth
3D Embossing Folder Problems
Do 3D Embossing Folders Need a Different Sandwich?
Yes. 3D embossing folders are thicker and designed to create deeper impressions, so they almost always require a different sandwich than standard 2D folders.
Why This Matters:
- 3D folders are physically thicker
- They create deeper dimension and require controlled compression
- Using a standard 2D sandwich can create too much pressure
What to Do:
- Check your machine-specific sandwich guide for 3D folders
- Remove extra plates or adapters if required
- Never force a 3D folder through resistance
My 3D Embossing Folder Is Too Thick to Fit
If your folder will not enter the rollers, the stack is too thick for your machine configuration.
Likely Causes:
- Using a 2D sandwich for a 3D folder
- Extra plates or shims added unnecessarily
- Warped plates increasing stack height
What to Try:
- Remove one plate layer and test
- Confirm the correct 3D sandwich recipe
- Rotate plates to reduce stacked warping
Never force the folder into the rollers. Reverse immediately if it resists.
My Embossing Folder Is Cracking at the Hinge
Embossing folders are flexible but not indestructible. Cracking usually results from excessive pressure or repeated over-compression.
Likely Causes:
- Sandwich too thick
- Incorrect configuration for 3D folders
- Feeding the folder at an extreme angle
What to Try:
- Reduce stack thickness
- Feed straight or only slightly angled
- Confirm correct sandwich for your machine
My Plates Are Warping or Wearing Out
My Plates Are Warped — How Warped Is Too Warped?
Some plate warping is normal. Cutting plates compress repeatedly and will naturally curve over time.
Normal Warping:
- Slight curve when placed on a flat surface
- Still feeds smoothly through the machine
Too Much Warping:
- Plate rocks dramatically on a flat surface
- Uneven cutting across large designs
- Stack feels unstable or inconsistent
If warping affects performance, replacement is recommended.
Helpful Products:
Magic Mat if compatible with your machine
My Plates Warp Immediately
If new plates bow after only a few passes, high pressure is likely the cause.
Likely Causes:
- Too many shims
- Incorrect sandwich for 3D folders
- Repeated cutting in the same area
What to Try:
- Reduce thickness slightly
- Rotate plates frequently
- Avoid cutting repeatedly in the same spot
My Cutting Plates Are Cloudy — Are They Ruined?
Cloudiness is cosmetic and normal. It comes from repeated pressure and micro-scratching.
Cloudy plates are not ruined unless performance is affected.
My Plates Stick Together After Cutting
Plates can stick due to pressure compression or static.
Likely Causes:
- High compression passes
- Heat buildup from friction
- Static cling
What to Try:
- Allow plates to cool briefly
- Gently flex to separate
- Reduce thickness in future passes
Adhesive and Residue Problems
My Adhesive-Backed Paper Is Gumming Up My Die
Adhesive-backed materials can leave sticky buildup on cutting edges and inside intricate designs.
Likely Causes:
- Sticker paper or foam adhesive sheets
- Repeated cutting without cleaning
What to Try:
- Clean die immediately after cutting adhesive materials
- Brush out buildup with a die brush tool
Helpful Products:
Die brush tool
How Do I Clean My Dies Safely?
Regular cleaning extends die life and improves cutting performance.
Safe Cleaning Steps:
- Use a pokey tool to remove paper bits
- Brush with a stiff brush or die brush tool
- Use a small amount of adhesive remover for sticky buildup
- Dry completely before storing
Avoid soaking dies in water.
Helpful Products:
Die brush tool
Pokey tool
How Do I Clean My Embossing Folders?
Embossing folders can collect ink, paste, and debris over time.
Safe Cleaning Steps:
- Wipe with a damp cloth
- Use mild soap if needed
- Dry completely before reuse
Avoid harsh chemicals that can weaken plastic.
Helpful Products:
Crafty Clean-up Cloths
Sandwich Recipes by Machine
Every die cutting machine works on the same principle: pressure. But each machine platform has slightly different plate thickness, adapters, and tolerances.
Always:
- Start with the manufacturer’s recommended sandwich
- Adjust one layer at a time
- Never force resistance
- Reverse immediately if it stalls
If something feels too tight or too loose, refer back to the troubleshooting sections earlier in this guide.

Sizzix Big Shot Sandwich Recipes
Thin Metal Dies
Platform
Cutting Plate
Cardstock
Die (blade down)
Top Cutting Plate
2D Embossing Folders
Platform
Standard Adapter
Embossing Folder with paper inside
Top Cutting Plate
3D Embossing Folders
Platform
3D Embossing Folder with paper
Top Cutting Plate
Remove the standard adapter unless specified. 3D folders are thicker.
Steel Rule Dies
Platform
Steel Rule Die (foam side up)
Material
Top Cutting Plate
Big Shot Switch Plus Sandwich Recipes
Electric version of the Big Shot with similar stacking.
Thin Metal Dies
Base
Cutting Plate
Cardstock
Die (blade down)
Top Cutting Plate
2D Embossing Folders
Base
Adapter Plate
Embossing Folder
Top Cutting Plate
3D Embossing Folders
Base
3D Folder
Top Cutting Plate
Spellbinders Platinum or Platinum 6 Sandwich Recipes
Thin Metal Dies
Platform
Cutting Plate
Cardstock
Die
Top Cutting Plate
2D Embossing Folders
Platform
Embossing Plate
Embossing Folder
Top Cutting Plate
3D Embossing Folders
Platform
3D Folder
Top Cutting Plate
Steel Rule Dies
Platform
Steel Rule Die
Material
Top Cutting Plate
Platinum Scout Sandwich Recipes
Same stacking principles as Platinum 6 but smaller footprint.
Thin Metal Dies
Platform
Cutting Plate
Cardstock
Die
Top Cutting Plate
2D Embossing Folders
Platform
Adapter
Folder
Top Cutting Plate
3D Embossing Folders
Platform
3D Folder
Top Cutting Plate
Anna Griffin Empress and Empress Elite Sandwich Recipes
Electric machines with controlled pressure.
Thin Metal Dies
Base
Clear Plate
Cardstock
Die
Top Clear Plate
2D Embossing Folders
Base
Adapter
Folder
Top Plate
3D Embossing Folders
Base
3D Folder
Top Plate
Empress Mini Sandwich Recipes
Thin Metal Dies
Base
Small Plate
Cardstock
Die
Top Plate
2D Embossing Folders
Base
Adapter
Folder
Top Plate
3D Embossing Folders
Base
3D Folder
Top Plate
Steel rule dies are generally not compatible with mini machines.
Gemini II, Gemini II Jr., and Gemini Pro Sandwich Recipes
Gemini machines use clear cutting plates without a traditional platform stack.
Thin Metal Dies
Clear Plate
Cardstock
Die (blade down)
Top Clear Plate
2D Embossing Folders
Folder with paper inside
Clear Plate
3D Embossing Folders
3D Folder
Clear Plate
Steel Rule Dies
Use manufacturer-approved configuration only.
Gina K Intri-Cut Sandwich Recipes
Manual machine with strong compression.
Thin Metal Dies
Platform
Cutting Plate
Cardstock
Die
Top Cutting Plate
2D Embossing Folders
Platform
Adapter
Folder
Top Plate
3D Embossing Folders
Platform
3D Folder
Top Plate
Sizzix Sidekick Sandwich Recipes
Mini manual machine.
Thin Metal Dies
Base
Small Cutting Plate
Cardstock
Die
Top Plate
2D Embossing Folders
Base
Folder
Top Plate
3D Embossing Folders
Base
3D Folder
Top Plate
Steel rule dies are not compatible.
Common Adjustments for Any Machine
If your die does not cut all the way through:
- Add one sheet of copy paper as a shim
- Rotate or flip plates
If embossing is too light:
- Confirm folder type
- Add minimal shim
- Spritz lightly
If the sandwich will not feed:
- Remove one layer
- Confirm 3D folder configuration
- Reverse immediately
Important Safety Rules
- Never force a sandwich.
- Never stack random metal objects as shims.
- Never mix incompatible adapters.
- Always adjust one layer at a time.
Glossary
Pressure & Sandwich Terms
Sandwich
The layered stack of plates, paper, and a die or embossing folder that you feed through your machine to create pressure.
Pressure
The amount of force applied by the machine’s rollers to cut or emboss. Correct pressure produces clean cuts and crisp impressions.
Shim
A thin layer such as copy paper, cardstock, plastic, or metal added to a sandwich to slightly increase pressure.
Too Thick vs. Too Thin
A pressure imbalance. Too thin results in incomplete cuts or faint embossing. Too thick causes resistance, plate bowing, or cracking.
Speed Bump Effect
The sudden resistance felt when the leading edge of a sandwich hits the rollers unevenly.
Machine & Plate Terms
Platform (Base Plate)
The foundational plate that supports the sandwich and determines overall stack thickness.
Cutting Plate
The clear plastic plates that sit above and below your die or folder to distribute pressure and protect the machine.
Warped Plate
A cutting plate that has curved from repeated pressure. Slight warping is normal; excessive rocking affects performance.
Cutting Plate Grooves
The cut lines left behind on plates after use. Grooves are expected and help with pressure distribution over time.
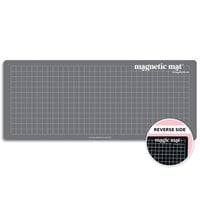
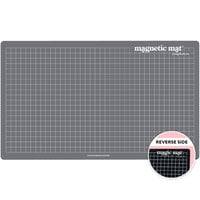
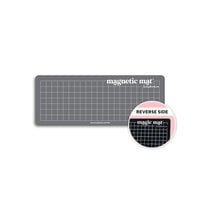
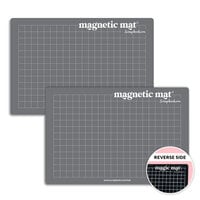
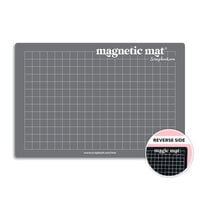
Magic Mat
A flexible cutting mat used in certain sandwich setups to improve pressure distribution and reduce plate warping. See additional articles for compatibility and setup details.
Roller System
The internal rollers that compress the sandwich and apply pressure as it passes through the machine.
Die Types & Cutting Terms
Thin Metal Die
A chemically etched steel die used with cutting plates to cut detailed shapes from paper.
Steel Rule Die
A thicker die with a raised blade embedded in foam, typically used for cutting heavier materials.
Cutting Edge (Blade Down)
The raised, sharp edge of a die that performs the cut. “Blade down” means placing that edge against the paper.
Release Paper
A thin sheet such as wax paper used between the die and cardstock to help intricate cuts release cleanly.
Pokey Tool
A small pointed tool used to remove paper from detailed dies through tiny release holes.
Embossing Terms
Emboss
To press a design into paper so the pattern is raised above the surface.
Deboss
To press a design into paper so the pattern is recessed below the surface.
2D Embossing Folder
A thinner embossing folder that creates surface-level texture.
3D Embossing Folder
A thicker folder that creates deeper, sculpted impressions and usually requires a different sandwich.
Hinge-First (Chomp First)
A feeding method where the folded edge of an embossing folder enters the rollers first.
Paper & Material Terms
Solid-Core Cardstock
Cardstock that is the same color throughout, so cracks or cuts do not reveal a white interior.
White-Core Cardstock
Cardstock with color only on the surface. Cracks or deep embossing may reveal a white center.
Coated Cardstock
Paper with a smooth or glossy surface layer that may react differently under pressure.
Specialty Cardstock
Papers with added texture, glitter, metallic finishes, or adhesive backing that may require pressure adjustments.